Showing posts with label Cooking. Show all posts

Chocolate cupcakes with toasted marshmallow frosting

Tuesday, 3 June 2014

image

I was closing the many tabs I had open on my tablet and saw that I had searched for a chocolate cupcake and toasted marshmallow frosting recipe. It must have been after I watched an episode of nerdy nummies or came across it on Pinterest. Whatever it was it had me thinking of cupcakes and that marshmallow frosting for two days!

I wasn't too keen on the recipe for the cupcakes so I only used the frosting part of the recipe and adapted a mississippi mudcake recipe I had from the hummingbird bakery book.

We reduced a few things and changed the quantities a little. They still came out very rich so if you're after a lighter chocolate cupcake this is not the recipe. I might try a lighter one next but I do love me some mudcake =).

This recipe makes about 24 large cupcakes or 50 mini cupcakes. If you make a smaller batch remember to reduce the frosting quantities too.

Chocolate cupcakes

165g unsalted butter
400g Caster sugar
2 eggs
300g plain flour
95g coco powder
1.5tsp bicarbonate of soda
pinch of salt
250ml of buttermilk
1/2 tsp vanilla extract
250ml of boiling water


Method:

  1. Preheat oven to 170 degrees C
  2. Cream butter and sugar together until light and fluffy. Add the eggs one at a time, mixing well and scraping down the sides of the bowl after each egg.
  3. In another bowl, sift the flour, coco powder, bicarbonate of soda and salt together. Mix buttermilk and vanilla in a jug. Add the dry ingredients to the creamed butter and sugar in three additions, alternating wit the buttermilk mixture. Mix well on medium speed. Slowly add the boiling water, mixing until combined.
  4. Line a cupcake tin (or mini cupcake tin) and fill each one to the top or about a mm below. They rise a bit and the mini cupcakes don't sink very much so I like to fill them up and get a nice round top.
  5. Bake for about 15 mins or until a skewer comes out clean.
  6. Leave to cool before frosting.
image

Marshmallow frosting

4 large egg whites at room temperature
1 cups granulated sugar
1/4 tsp cream of tartar
Pinch of fine salt
1 tsp vanilla extract


Method:

  1. Prepare a bain marie.
  2. Whisk together egg whites, sugar, cream of tartar and salt. Heat mixture on the bain marie until the sugar has dissolved.
  3. Take off the heat and beat on medium speed for 1 minute. Then whisk on high until stiff peaks form.
  4. Whisk in vanilla extract.
  5. Transfer to a piping bag with a star tip and pipe generously onto each cupcake.
  6. Using a blowtorch toast the marshmallow frosting, being careful not to burn them.

Serve immediately or store in an airtight container for 3 hrs .

Edit: We had left overs that we kept out at room temperature for a few days and still tasted great! Make sure you pipe the frosting on all the cupcakes and toast them before putting them away or you'll need to rewhip the frosting.

image
image

Enjoy

Thanks for stopping by!


More Macarons: Pandan and Coconut flavour and Black Sesame

Saturday, 31 May 2014


A couple of weeks ago we had a birthday gathering for K's grandma. I've been meaning to try making pandan and coconut macarons for a while now but after the blitz of making heaps of macaroons last year we where a little over eating macarons.

I did a search online and came across so many variations! There was one that just used store bought kaya as the filling, I think that would have tasted great but would've been too sweet for me after having one. So I settled on a recipe from cakeisthenewblack. This recipe didn't use pandan leaves just the extract, I haven't been able to find any pandan leaves in the shops, coconut milk and not too much dessicated coconut which I'm not a fan of but was contemplating adding for the texture.

As I was rummaging around my pantry for my pandan extract I came across a bag of black sesame and decided to try making some black sesame ganache too. Black sesame is one of my favourite flavours!

We used the same macaron recipe as on my previous post simple macarons.
We added pandan extract to both the shells and the ganache to make it extra pandan-y.


Neat rows of shells ready for baking. We added some of the black sesame to the shell to see if they'd look good. J said they looked like ants, but they did end up looking quite good. 

Ganache recipes

Pandan and coconut

50g coconut milk
pandan extract (I added 3-3.5tsp )
90g white chocolate ( I used the nestle white chocolate melts)
35g unsalted butter, softened
5g dessicated coconut

Black Sesame

50g coconut milk
80g white chocolate
2tbsp of black sesame


  1. Melt the white chocolate in the microwave (or a bain marie)
  2. Add the butter and mix well
  3. Slowly add the coconut milk.
  4. Then add the rest of the ingredients and mix throughly.
  5. leave in the fridge to chill and set. 


Yummy macarons ready for the party! And of course mini macarons for "taste testing" =)

Enjoy! and thanks for stopping by!


Simple Macaroons

Friday, 10 August 2012

As part of our sweets making day I put up a picture of the fantastic macaroons my friend taught me to make. We made purple/ lilac colored ones half choc peppermint and half choc passionfruit flavoured.

A mini one just for fun
For the shells we need:

140g egg whites (room temperature
180g caster sugar (split into 2 seperate bowls)
160g icing sugar
160g almond meal
Food coloring
Essence (Optional)
  • First we sift almond meal and icing sugar into a bowl and set aside
  • Mix egg whites in a bowl on low speed with an electric mixer until there is no more liquid.
  • Then add in one of the bowls of caster sugar. Gradually increase speed and beat until the mixture forms stiff peaks.
  • Add the second bowl of caster sugar, mix until the sugar has dissolve and the meringue forms stiff peaks.
  • Add coloring to the mixture of dry ingredients, essence can also be added at this stage if you wanted the flavoring in the shells rather then the filling. Lightly mix color through.
  • Tip into the meringue mixture. Starting slowly stir mixture together making sure all ingredients are combined. Then start scratching the surface while accelerating as you stir. You can be a bit rough at this point because you want to knock out some of the air.
  • The mixture will become more liquid and it is ready when it falls off the spatula easily and takes about 20 seconds to ooze back. If the fallen part just sits on top then keep mixing.
  • On a lined baking tray pipe out the shells trying to keep consistent sizes. After piping is finished take both sides of the tray and bang it a couple of times on a hard surface. This is to get rid of some air and to settle the imperfections from piping.
  • Preheat oven to 150 degrees and leave the macaroons to sit in room temperature until they form a skin. Bake in the oven for approximately 12 minutes or until they are solid when touched.
  • Leave them to cool before piping in the filling.
Ganache:

100g Dark Chocolate
90g of thicken cream
20g of Butter
1/3 can of passion fruit pulp or
1 tsp of peppermint essence
  1. Melt chocolate in the microwave and mix in the butter and thichken cream.
  2. Split into two portions. In one portion add in a few drops of peppermint essence and mix.In the other portion sieve in the passionfruit pulp and mix.
  3. Put mixtures into the fridge until ready to use or is set. Should be less liquidy.
To assemble:
  • Match up the shells together
  • You can either use a piping bag or we just used a spoon. Place a bit in the center of one side and place the other half on top and give it a little squeeze. The filling should come just out to the edges.
We got the recipe off YouTube but used a slightly different ganache recipe. It's a French chef making the macaroons and a domestic kitchen. Enjoy!


Cocoa Chiffon cake

Friday, 3 August 2012

For over a week I'd been craving pandan cake but when I went to the Asian supermarkets in Auburn, none of them had pandan leaves or essence. Not wanting to drive to cabramatta we decided to at least have chiffon cake.

I found this recipe from the group recipes website but we just made the cake and not the icing. We also adjusted some of the amounts, 7/8 cups is a bit fiddly to measure out. The link to the original recipe is below if you want to checkout the original.

Also we accidentally added bicarbonate soda instead of baking powder, so the cake turned out a little more dense then what's expected of chiffon cake. It was still tasty even if it didn't turn out exactly how we wanted.

Cocoa Chiffon cake
Serves 8

Ingredients
100mls of boiling water
1/4 cup of cocoa
1 cup of sifted "soft as silk" flour ( we used gluten free wheat flour)
1 cup of sugar
1 1/2 tsp of baking powder
1/2 tsp of salt
1/4 cup of salad oil
4 unbeaten egg yolks
1/2 teaspoon of vanilla extract
4 egg whites
1/4 tsp of cream of tartar

Method:

  • Mix cocoa and boiling water and stir until smooth.
  • In a mixing bowl sift together flour, sugar, baking powder and salt.
  • Make a well and add in order; salad oil, unbeaten egg yolks, the cooled cocoa mixture and 1/2 a tsp of vanilla. Beat with a spoon until smooth.
  • In a large mixing bowl, whip eggs hits lightly. Add the cream of tartar and whip until it forms stiff peaks.
  • Pour cocoa and egg yolk mixture gradually over the whipped egg whites, gently fold together with a rubber spatula until just blended. DO NOT STIR.

  • Pour into an ungreased pan at once. Bake at 160 C/325 F degrees for 50-55 minutes.
  • The cake is ready when a skewer comes out clean. Leave to cool for a bit and over turn onto a plate.
Yum yum.

Takoyaki!! Yum

Thursday, 19 July 2012

After watching a cute anime episode where two kitty cats fought and chased after a takoyaki, I definitely had a huge craving for one :p.

We prepared all the ingredients for the filling and prepared the batter. If you aren't a fan of octopus you can make vegetarian ones or use different types of meat. We used some cabanossi, zucchini, sweet corn! And one of my favorites is using the laughing cow cheese, either on it's own or with sweet corn.

We used a mistral brand dutch pancake maker, it's a good one to get because there is an electric bottom so you can make it at the table or you can take the iron pan off and use it on the stove. It also has a picture of an octopus on it haha so maybe they should just name it takoyaki maker.
 
So when all the ingredients are ready spray the moulds with oil. Half fill each mould with batter and put in your filling, then fill with more batter til the mould is full. Wait for the batter to crisp up a bit, this next part gets a bit messy. Pour more batter onto the pan so it overflows and start turning and tucking in the overflowed batter into the takoyaki with skewers. Repeat that until they form into nice crispy balls.
They can be served immediately but the filling is super hot. Pour mayonnaise or bulldog sauce on top and Bonita flakes before serving. Enjoy!

All this talk of takoyaki I think we should make it again :)

Takoyaki batter Recipe

2 eggs
200g wheat flour
680ml icy water
1 tsp granulated dashi
2 tsp soya sauce
Pinch of salt

1. Crack eggs into bowl and whisk.
2. Add icy water, dashi, soya sauce, salt and whisk together
3. Add flour, sift in 1/3 at a time and mix
 

Sweet sweet dessert day!

Tuesday, 10 July 2012

Yesterday a friend came over to show me how to make macaroons and in our excitement we ended up turning it into an awesome cooking day. We made macaroons, a roast pork for dinner, a snow egg and a little creme brûlée.

Here are a few peek previews and I'll link in the posts soon.

Our purple ( which turned out a lilac colour) macaroons.

My pork roast, a method I've trial over many years, its not perfect but pretty good almost every time, no major disasters.

Our snow eggs which we ended up making over three weeks. It was worth it in the end!! Extremely yummy and once we got it right it think it was as good as the one we had at quay.

And lastly our creme brûlée which we made last minute because we had a lot of egg yoke left over. It hasn't yet been eaten so I'll put up another photo of the sugary caramel top when we do.

After all that we'll definitely have to hold off on the sugar for a while :) ...... Maybe ;)

Thanks for the awesomely fun day Jancypants.


Ninja cookies!

Tuesday, 3 July 2012

I've been trying to find a decent cookie cutter recipe for a while to use with my ninja men cutters. I'm not a big fan of gingerbread, which is the recipe that came with the cutters, so I been testing out recipes. The previous recipes I've tried have either not been very nice or the cookies end up being Michelin ninjas.

This recipe is a base for all holiday recipes.

Sugar cookies

200g unsalted butter at room temperature
280g caster sugar
1/4 tsp vanilla extract
1 egg
400g plain flour
A pinch of salt
1/2 tsp cream of tartar

Your choice of icing

  1. Preheat oven to 170'C/ 325'F
  2. Mix butter, sugar and vanilla extract with an electric mixer until light and fluffy ( may take about 10 mins)
  3. Mix in the egg, scrape in the unmixed ingredients from the sides with a rubber spatula
  4. Add flour, salt and cream of tartar and mix well but don't over mix. The dough should be light soft and easy to handle
  5. roll out the dough on a lightly floured surface and cut out shapes with your cookie cutters
  6. Bake for ten minutes or until the edges are lightly golden and the centre is still pale
  7. Remove from the oven and let cool slightly before putting them on a cooling rack to cool completely before decorating
Excellent to have on their own, with a cup of coffee or tea.

Boeuf Bourguignon and Joel Robuchon's Pommes Purée

For Ken's birthday I wanted to make him a special meal. He loves stews and he also really loved the truffled potato mash we had at Aria. While I was in Hong Kong, my sister made Boeuf Bourguignon which was awesome and sent me the recipe (a Julia Child recipe of course) so I could make it for Ken.

She also told me about Joel Robuchon's mash potatoes. They had tried it at his restaurant and after testing out the recipe herself she understood why they were only served a table spoon of the mash each. Sweat and tears goes into making it.

My plan for the night was to make the Boeuf Bourguignon (BB), Joel Robuchon's mash, sides and dessert. I was thinking of creme brûlée but ended up making mini pecan pies.

So armed with a great idea, shopping list and not a shadow of a doubt of the task ahead (aka not clue as to the enormity of the task I had set for myself) I told Ken to get home at 6.30pm for a fabulous birthday meal.

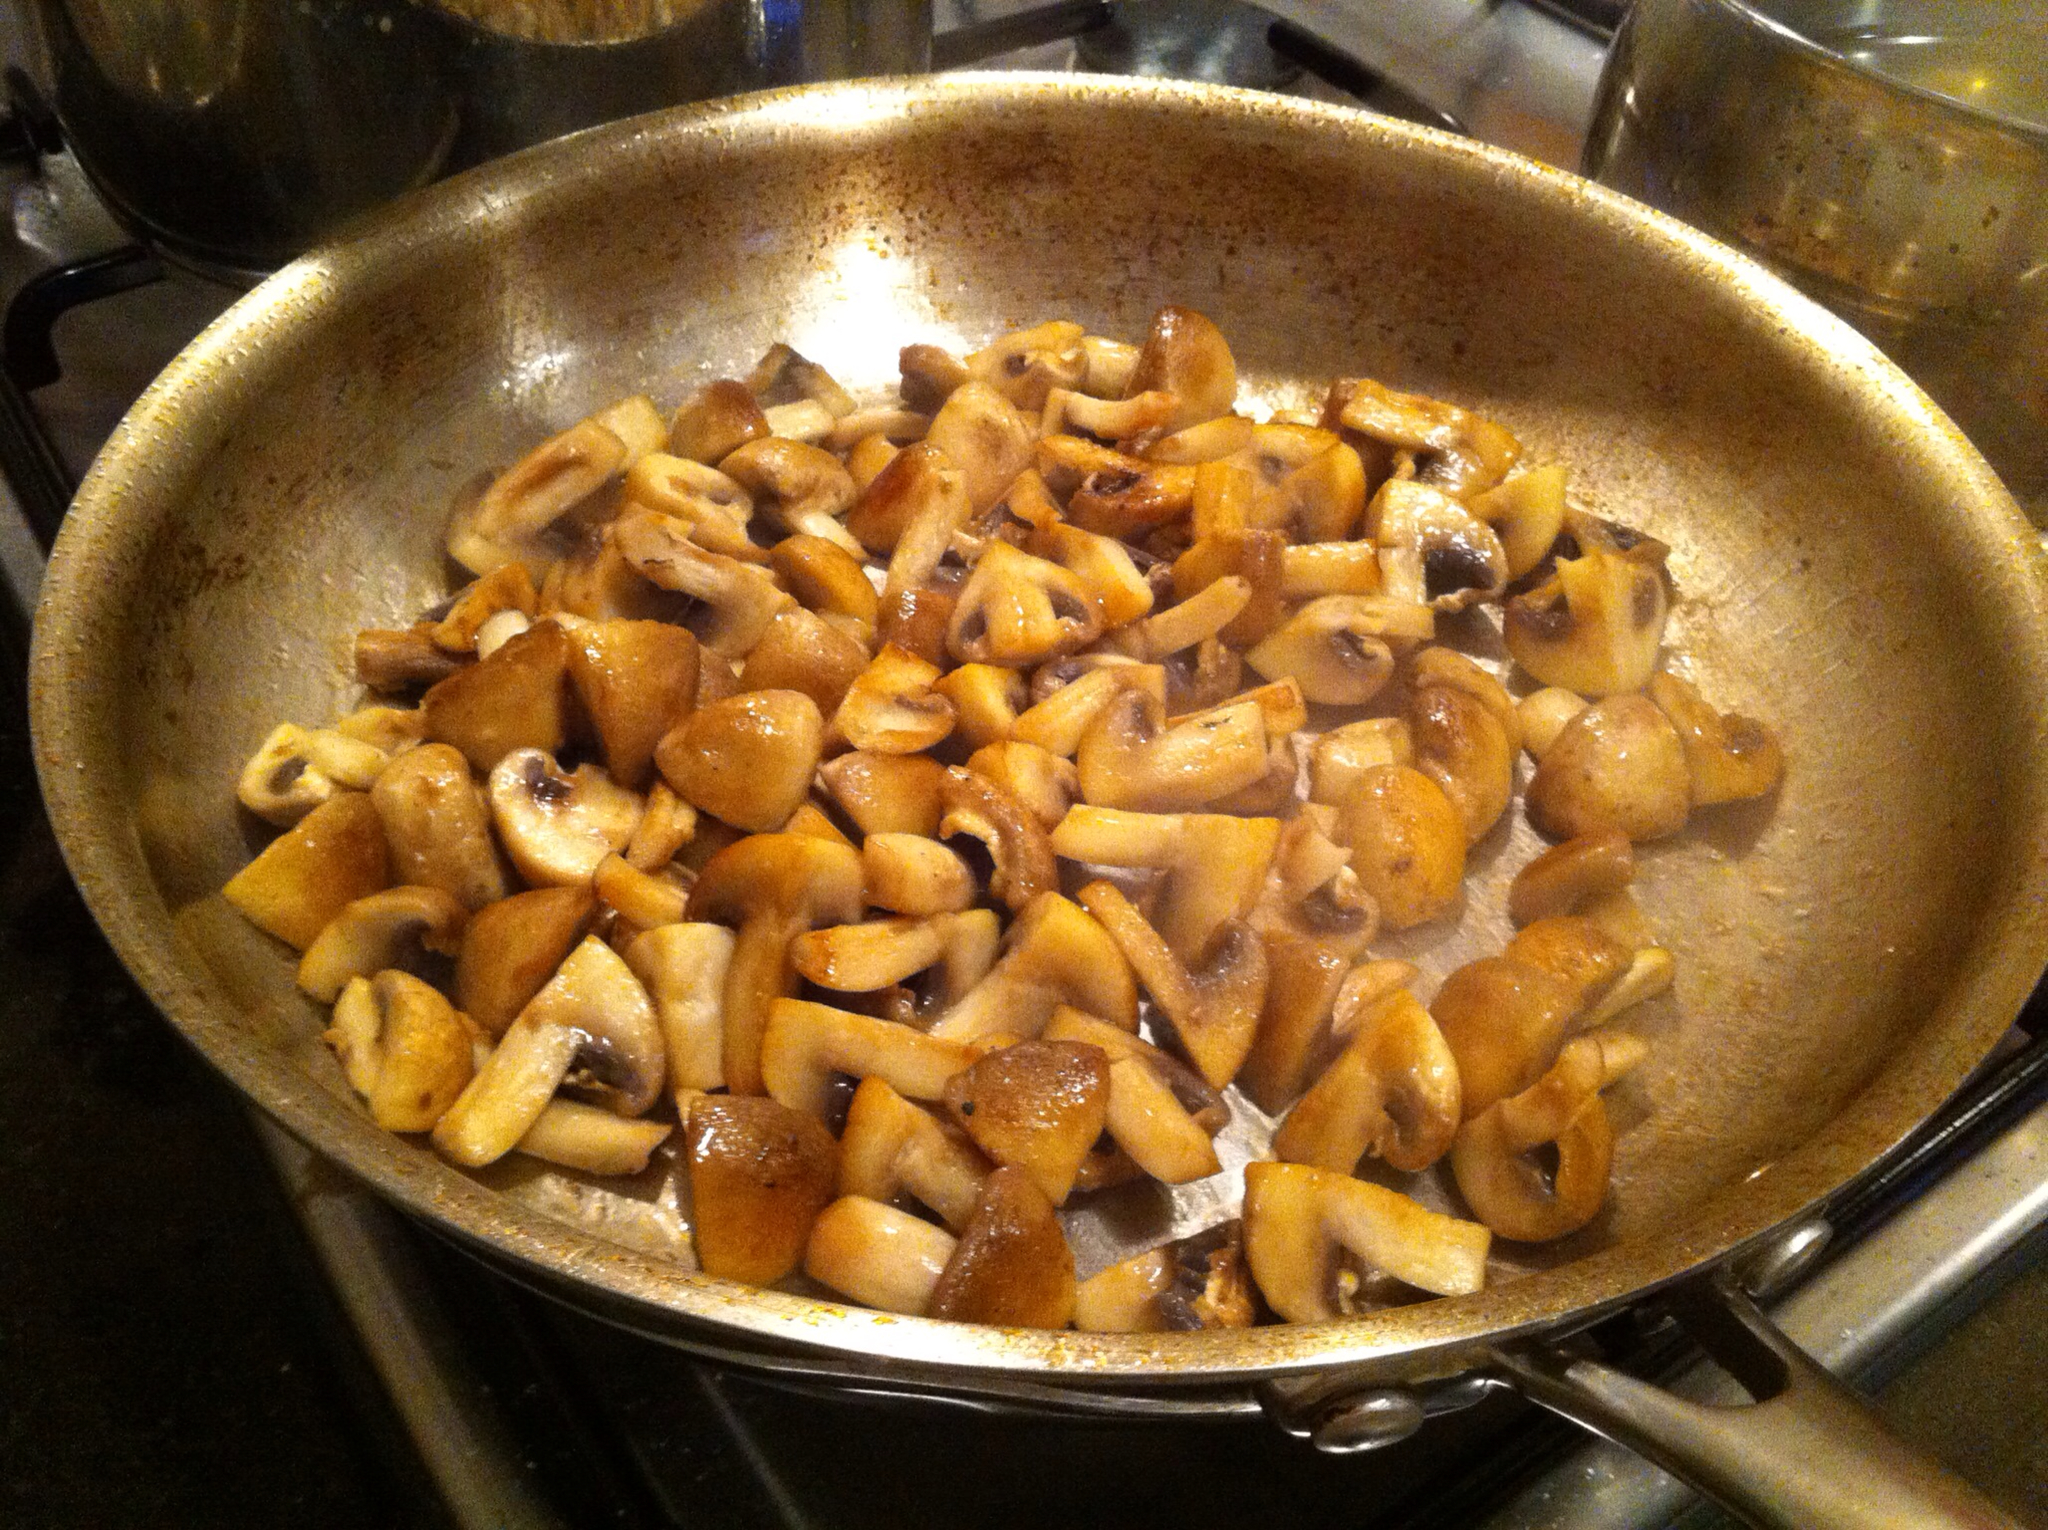
The BB recipe isn't complicated but there are lots of different things that need preparing. The mushrooms, onions and beef are all cooked separately and combined at the end.

Sautéing the mushrooms! My first try (successful try!) at tossing the mushrooms like in the movies. It was really fun and definitely a wrist strengthening workout!

The recipe calls for 1 inch onions but I didn't know where to get them in Australia. I did find some nice small onions at the fruit shop on the top floor in parramatta Westfields and just got Ken to peel back a few layers(luckily he came back early from work) which we used to cook with the beef so win win!

The onions were left to simmered for an hour. They were cooked through and so soft, sweet and still held their shape.

My entire house smelt delicious! The beef was cooked in the oven for 2.5hrs. I used my cast iron pot so the beef softened up really nicely and quickly.

While the beef was cooking I had boiled the potatoes. Definitely a sometimes food! the mash recipe calls for 900g of potatoes to 225g of butter! I started by pressing the potatoes through a sieve and then mixing in the butter. It was super easy to mix in because the potatoes were still hot. It was looking pretty good at this point.

We heated up the milk and Ken poured while I whipped the potatoes. I'd read that if you're not sweating at this point your not doing it right but unless you've got beefed up arms it feels they are going to fall off. It was definitely worth all the effort!

It was the best mash ever and I'm definitely going to try the real deal someday.


Joël Robuchon's pommes purée

900g/ 2 lbs russet potatoes
226.7g / 8 oz butter
3/4 to 1 1/4 cups milk brought to a boil and kept hot
sea salt to taste

  1. Starting with cold water, boil unpeeled potatoes until a fork inserted meets barely any resistance.
  2. Peel potatoes while still hot (very easy but I used a spoon it was too hot).
  3. Push the potatoes through a ricer ( I just used a sieve) into a pot and stir over very low heat until steam no longer escapes (about 5 minutes)
  4. Add butter by vigorously stirring potatoes until incorporated
  5. Add 3/4 cup milk in a slow stream while vigorously whipping potatoes, incorporating air into the mixture. (That's the ultimate sweaty part!)
  6. Add salt, more milk as necessary, until desired taste and texture.
  7. For that extra level of refinement, pass through a tamis (fine sieve).
Boeuf Bourguignon

Beef

170g/ 6 ounce bacon and rind
1tb olive or cooking oil
1.36kg/ 3 lbs lean stewing beef cut into cubes (approx 2 inches)
1 sliced carrot
1 sliced onion
1 tsp salt
1/4 tsp pepper
2 Tb flour
3 cups of full bodied, young red wine. Something that would taste nice served with the meal.
2-3 cups brown beef stock or beef bouillon
1tb tomato paste
2 cloves of garlic, mashed
1/2 tsp thyme
A crumbled bay leaf

Onions stewed in stock (see below)
Mushrooms sautéed in butter (see below)

  1. Remove rind from bacon and cut bacon into lardons ( sticks approx 1cm x 3cm long). Simmer rind and bacon for 10mins in 1.5 liters of water. Drain and dry
  2. Preheat oven to 230 degrees celsius / 450 degrees fahrenheit
  3. Sauté bacon in the oil for 2-3 mins til lightly browned. Remove bacon and put casserole aside.
  4. Reheat oil and bacon fat til it is smoking slightly before you sauté the beef. Dry the beef with paper towels and sauté a few pieces at a time until all sides are browned
  5. Add it to the bacon
  6. Brown the sliced vegetables in the remaining bacon fat. Discard sautéing fat.
  7. Return the beef and bacon to the casserole, toss with salt and pepper. The sprinkle on the flour and toss to lightly coat the beef.
  8. Set casserole in the middle position of the oven for 4 minutes. Toss the meat and return to the oven for 4 minutes more. Remove casserole and turn ove down to 160 degrees celsius/ 325 degrees fahrenheit
  9. Stir in the wine and enough stock so the beef is just covered.
  10. Add the garlic, herbs, tomato past and bacon rind. Bring to a simmer, then cover and put the casserole in the lower third shelf of the oven.
  11. Regulate heat so the liquid is simmering very slowly for 2.5/3 hours. The meat is done when a fork pierces it easily.
  12. Prepare onions and mushrooms while beef is cooking.
  13. When the meat is done, pour the contents of the casserole into a sieve over a saucepan. Wash out the casserole and return the beef and bacon to it. Add the cooked onions and mushroom
  14. Simmer the sauce in the saucepan skimming off the fat as it arises for 1-2 minutes. You should have 2.5 cups of sauce thick enough to lightly coat a spoon. Boil down if it is too thin or add stock if it is too thick. Taste for seasoning and pour sauce over the meat and vegetables.
  15. Simmer for 2-3 mins basting the meat in the sauce and serve.
Onions

18-24 peeled mini white onions (1inch diameter)
1.5 tb butter
1.5 tb oil
1/2 cup of brown stock, dry red or white wine or water
Salt & pepper to taste
Herb bouquet: 4 parley sprigs, 1/2 bay leaf and 1/4 tsp thyme tied in a cheese cloth

  1. Heat butter and oil in a skillet until bubbling.
  2. On moderate heat sauté the onions for 10 minutes, rolling them sp they will brown as evenly as possible.
  3. Pour in liquid, season to taste and add the herb bouquet.
  4. Cover and simmer for 40-50 minutes until the onions are tender but retain their shape and the liquid has evaporated. Remove the herb bouquet
Mushrooms

2 tb butter
1 tb oil
225g/ 1/2 lb. fresh mushrooms whole or quartered if large

  1. Heat butter and oil on high heat until the butter foamin subsides.
  2. Add mushrooms and toss for 4-5 minutes
  3. Remove from pan when the mushrooms are lightly browned.
Enjoy! It was absolutely delicious and well worth the effort. It tasted even better the next day.


Banana chocolate pecan pie

Monday, 28 May 2012

Pecan pie, my first baked good to win my hubbies tummy :). This is a recipe I've had for years but it always bothered me that the filling is just mostly maple syrup. So this time we added a layer of banana in it, which I worked out great!

PAC man pie :)

Ingredients:

Pie crust:
200g/ 1 3/4 cups of plain flour
75ml/ 5 tbsp caster sugar
90g of unsalted butter, softened
1 egg, beaten
Finely grated rind of 1 orange

Filling:
1/2 cup of golden syrup
3 tbsp of brown sugar
150g plain chocolate, chopped into small pieces
50g of butter
3 eggs, beaten
5ml/1tsp of vanilla essence
250g pecans
1 banana

This is my tweaked version of the recipe. If you plan on microwaving the butter when making the pie crust I recommend using less butter and adding it in small doses. The crust turns out a bit harder but then it doesn't take as long to knead the dough. If you've got time do it the long way, I'd do it that way.

  1. Sift flour into a bowl and stir in the sugar. Work in the butter evenly with your fingertips until combined.
  2. Beat the egg and orange rind in a bowl, then stir into the mixture to make a firm dough. Add water if the dough is too dry.
  3. Roll out pastry on a lightly floured surface and line a 20cm loose based pie tin. Chill for 30 mins.
  4. Preheat oven to 180 degrees celsius/ 350 degrees fahrenheit.
  5. Melt the syrup, sugar, chocolate and butter in a small saucepan.
  6. Remove saucepan from the heat and beat in eggs and vanilla essence
  7. Thinly slice the banana into 5mm discs. Line the bottom of the pastry with pecans, then a layer of banana and another layer of pecans
  8. Carefully pour chocolate mixture into the pastry case and bake for 50-60 mins or until the filling is set
  9. Leave it in the tin to cool for 10 mins before serving.
 

Bulgogi Beef pie

Tuesday, 15 May 2012

My pie machine is one of my favourite kitchen appliances. It's so easy to use and it's quick!

Yesterday, we were a bit lazy and couldn't be bothered picking up more groceries so we had a look in the fridge and decided to Iron chef it.

Turned out well. We had about 300g of bulgogi ( frozen from the last time we got some bulgogi mix from Costco), puff pastry ( usually try to always have some around for pie), broccoli, happy cow cheese and some potato gems. Hmmmm poTATOoooo!

First we stir fried the bulgogi and mixed in the chopped broccoli.

Cut out circles of pastry for the base and lid of the pie crust. The cutters come with the machine and the cut pastry is about 12cm in diameter and the smaller one is about 10cm.

Load up the base with filling, cheese on top. Put the pastry lid on top and close the machine.

It takes about 5-6 minutes depending on how brown and crispy you want the pastry. Voila! Yummy pie.

We got 11 pies out of 4 sheets of puff, that's plenty for three people and we were hungry! We used the left over puff and squished the edges together to make more molds (hence the manky looking lid in the uncooked pies photo) but as you can see in the above photo the pies turn out just fine, just don't make them too thin or dense or they won't puff properly.

So an easy way to use a pie machine. And remember you can usethem for dessert pies too. If you don't have one, request one for the next present giving event :). They're great!


Popular Posts

Tags