Hello to everyone that has stumbled onto my blog!
I have recently moved my blog to http://madebypensuke.wordpress.com
I decided to move because I was finding it frustrating to change the layout of my blog and I wasn't sure if all these wonderful page views I was getting were bots or people actually checking out some of my projects.
If you are interested in seeing more craft, food and general hobby posts, please come visit me at my new home.
My axololt , Sebastian, giving you a big smile enticing you to visit us =)
Chocolate cupcakes with toasted marshmallow frosting
Tuesday 3 June 2014

I was closing the many tabs I had open on my tablet and saw that I had searched for a chocolate cupcake and toasted marshmallow frosting recipe. It must have been after I watched an episode of nerdy nummies or came across it on Pinterest. Whatever it was it had me thinking of cupcakes and that marshmallow frosting for two days!
I wasn't too keen on the recipe for the cupcakes so I only used the frosting part of the recipe and adapted a mississippi mudcake recipe I had from the hummingbird bakery book.
We reduced a few things and changed the quantities a little. They still came out very rich so if you're after a lighter chocolate cupcake this is not the recipe. I might try a lighter one next but I do love me some mudcake =).
This recipe makes about 24 large cupcakes or 50 mini cupcakes. If you make a smaller batch remember to reduce the frosting quantities too.
Chocolate cupcakes
165g unsalted butter
400g Caster sugar
2 eggs
300g plain flour
95g coco powder
1.5tsp bicarbonate of soda
pinch of salt
250ml of buttermilk
1/2 tsp vanilla extract
250ml of boiling water
Method:
- Preheat oven to 170 degrees C
- Cream butter and sugar together until light and fluffy. Add the eggs one at a time, mixing well and scraping down the sides of the bowl after each egg.
- In another bowl, sift the flour, coco powder, bicarbonate of soda and salt together. Mix buttermilk and vanilla in a jug. Add the dry ingredients to the creamed butter and sugar in three additions, alternating wit the buttermilk mixture. Mix well on medium speed. Slowly add the boiling water, mixing until combined.
- Line a cupcake tin (or mini cupcake tin) and fill each one to the top or about a mm below. They rise a bit and the mini cupcakes don't sink very much so I like to fill them up and get a nice round top.
- Bake for about 15 mins or until a skewer comes out clean.
- Leave to cool before frosting.

Marshmallow frosting
4 large egg whites at room temperature
1 cups granulated sugar
1/4 tsp cream of tartar
Pinch of fine salt
1 tsp vanilla extract
Method:
- Prepare a bain marie.
- Whisk together egg whites, sugar, cream of tartar and salt. Heat mixture on the bain marie until the sugar has dissolved.
- Take off the heat and beat on medium speed for 1 minute. Then whisk on high until stiff peaks form.
- Whisk in vanilla extract.
- Transfer to a piping bag with a star tip and pipe generously onto each cupcake.
- Using a blowtorch toast the marshmallow frosting, being careful not to burn them.
Serve immediately or store in an airtight container for 3 hrs .
Edit: We had left overs that we kept out at room temperature for a few days and still tasted great! Make sure you pipe the frosting on all the cupcakes and toast them before putting them away or you'll need to rewhip the frosting.


Enjoy
Thanks for stopping by!
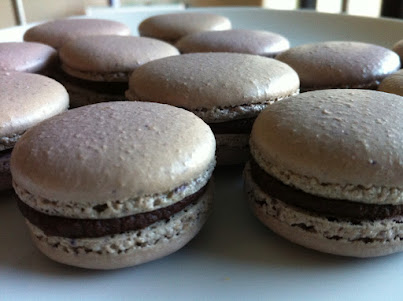
More Macarons: Pandan and Coconut flavour and Black Sesame
Saturday 31 May 2014
A couple of weeks ago we had a birthday gathering for K's grandma. I've been meaning to try making pandan and coconut macarons for a while now but after the blitz of making heaps of macaroons last year we where a little over eating macarons.
I did a search online and came across so many variations! There was one that just used store bought kaya as the filling, I think that would have tasted great but would've been too sweet for me after having one. So I settled on a recipe from cakeisthenewblack. This recipe didn't use pandan leaves just the extract, I haven't been able to find any pandan leaves in the shops, coconut milk and not too much dessicated coconut which I'm not a fan of but was contemplating adding for the texture.
As I was rummaging around my pantry for my pandan extract I came across a bag of black sesame and decided to try making some black sesame ganache too. Black sesame is one of my favourite flavours!
We used the same macaron recipe as on my previous post simple macarons.
We added pandan extract to both the shells and the ganache to make it extra pandan-y.

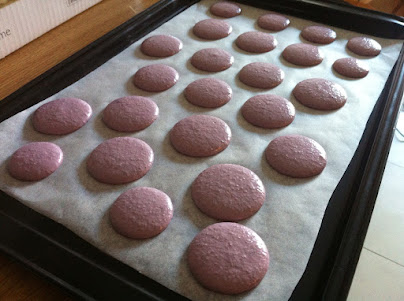
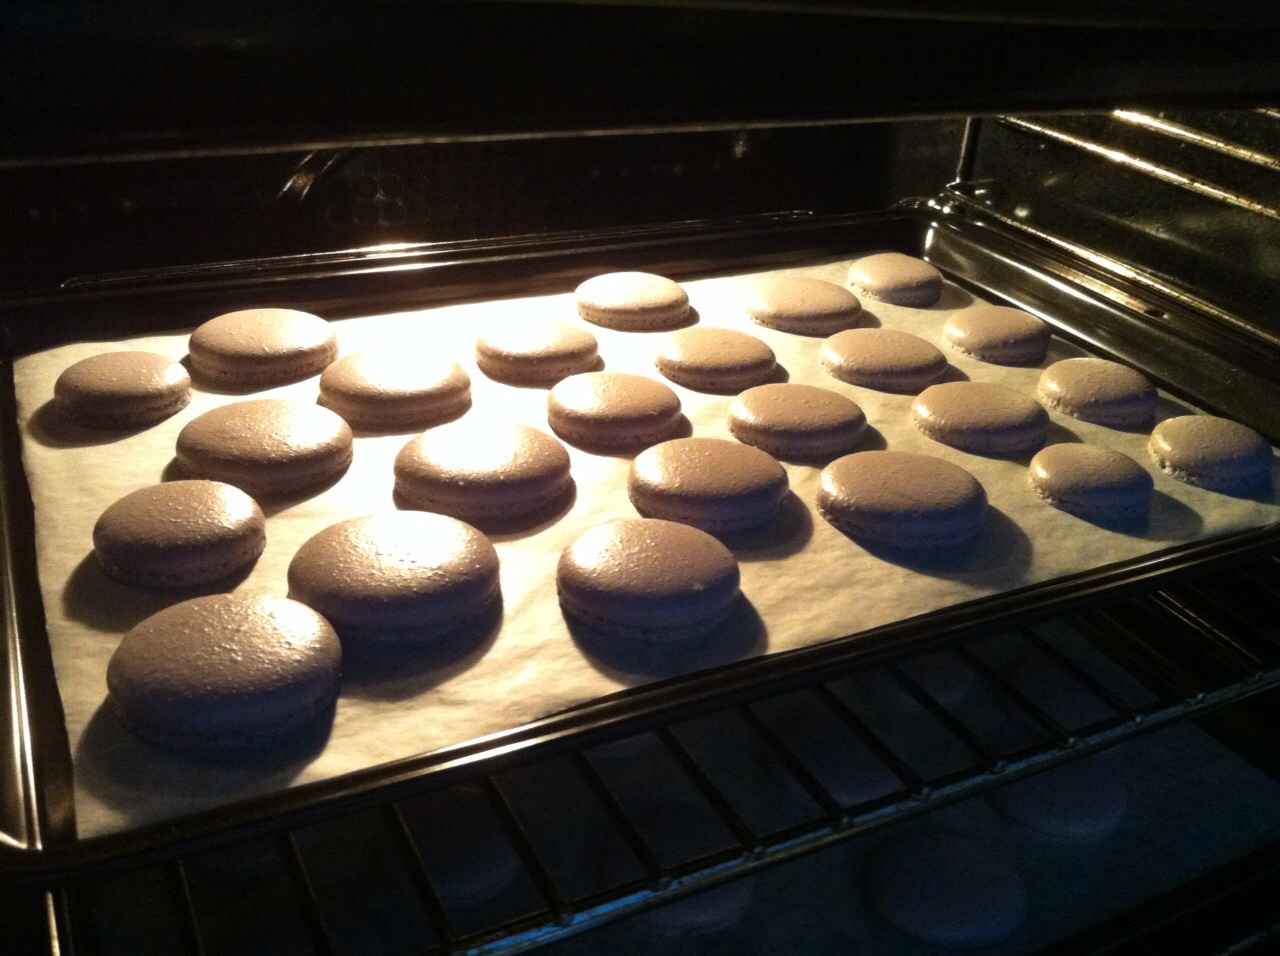
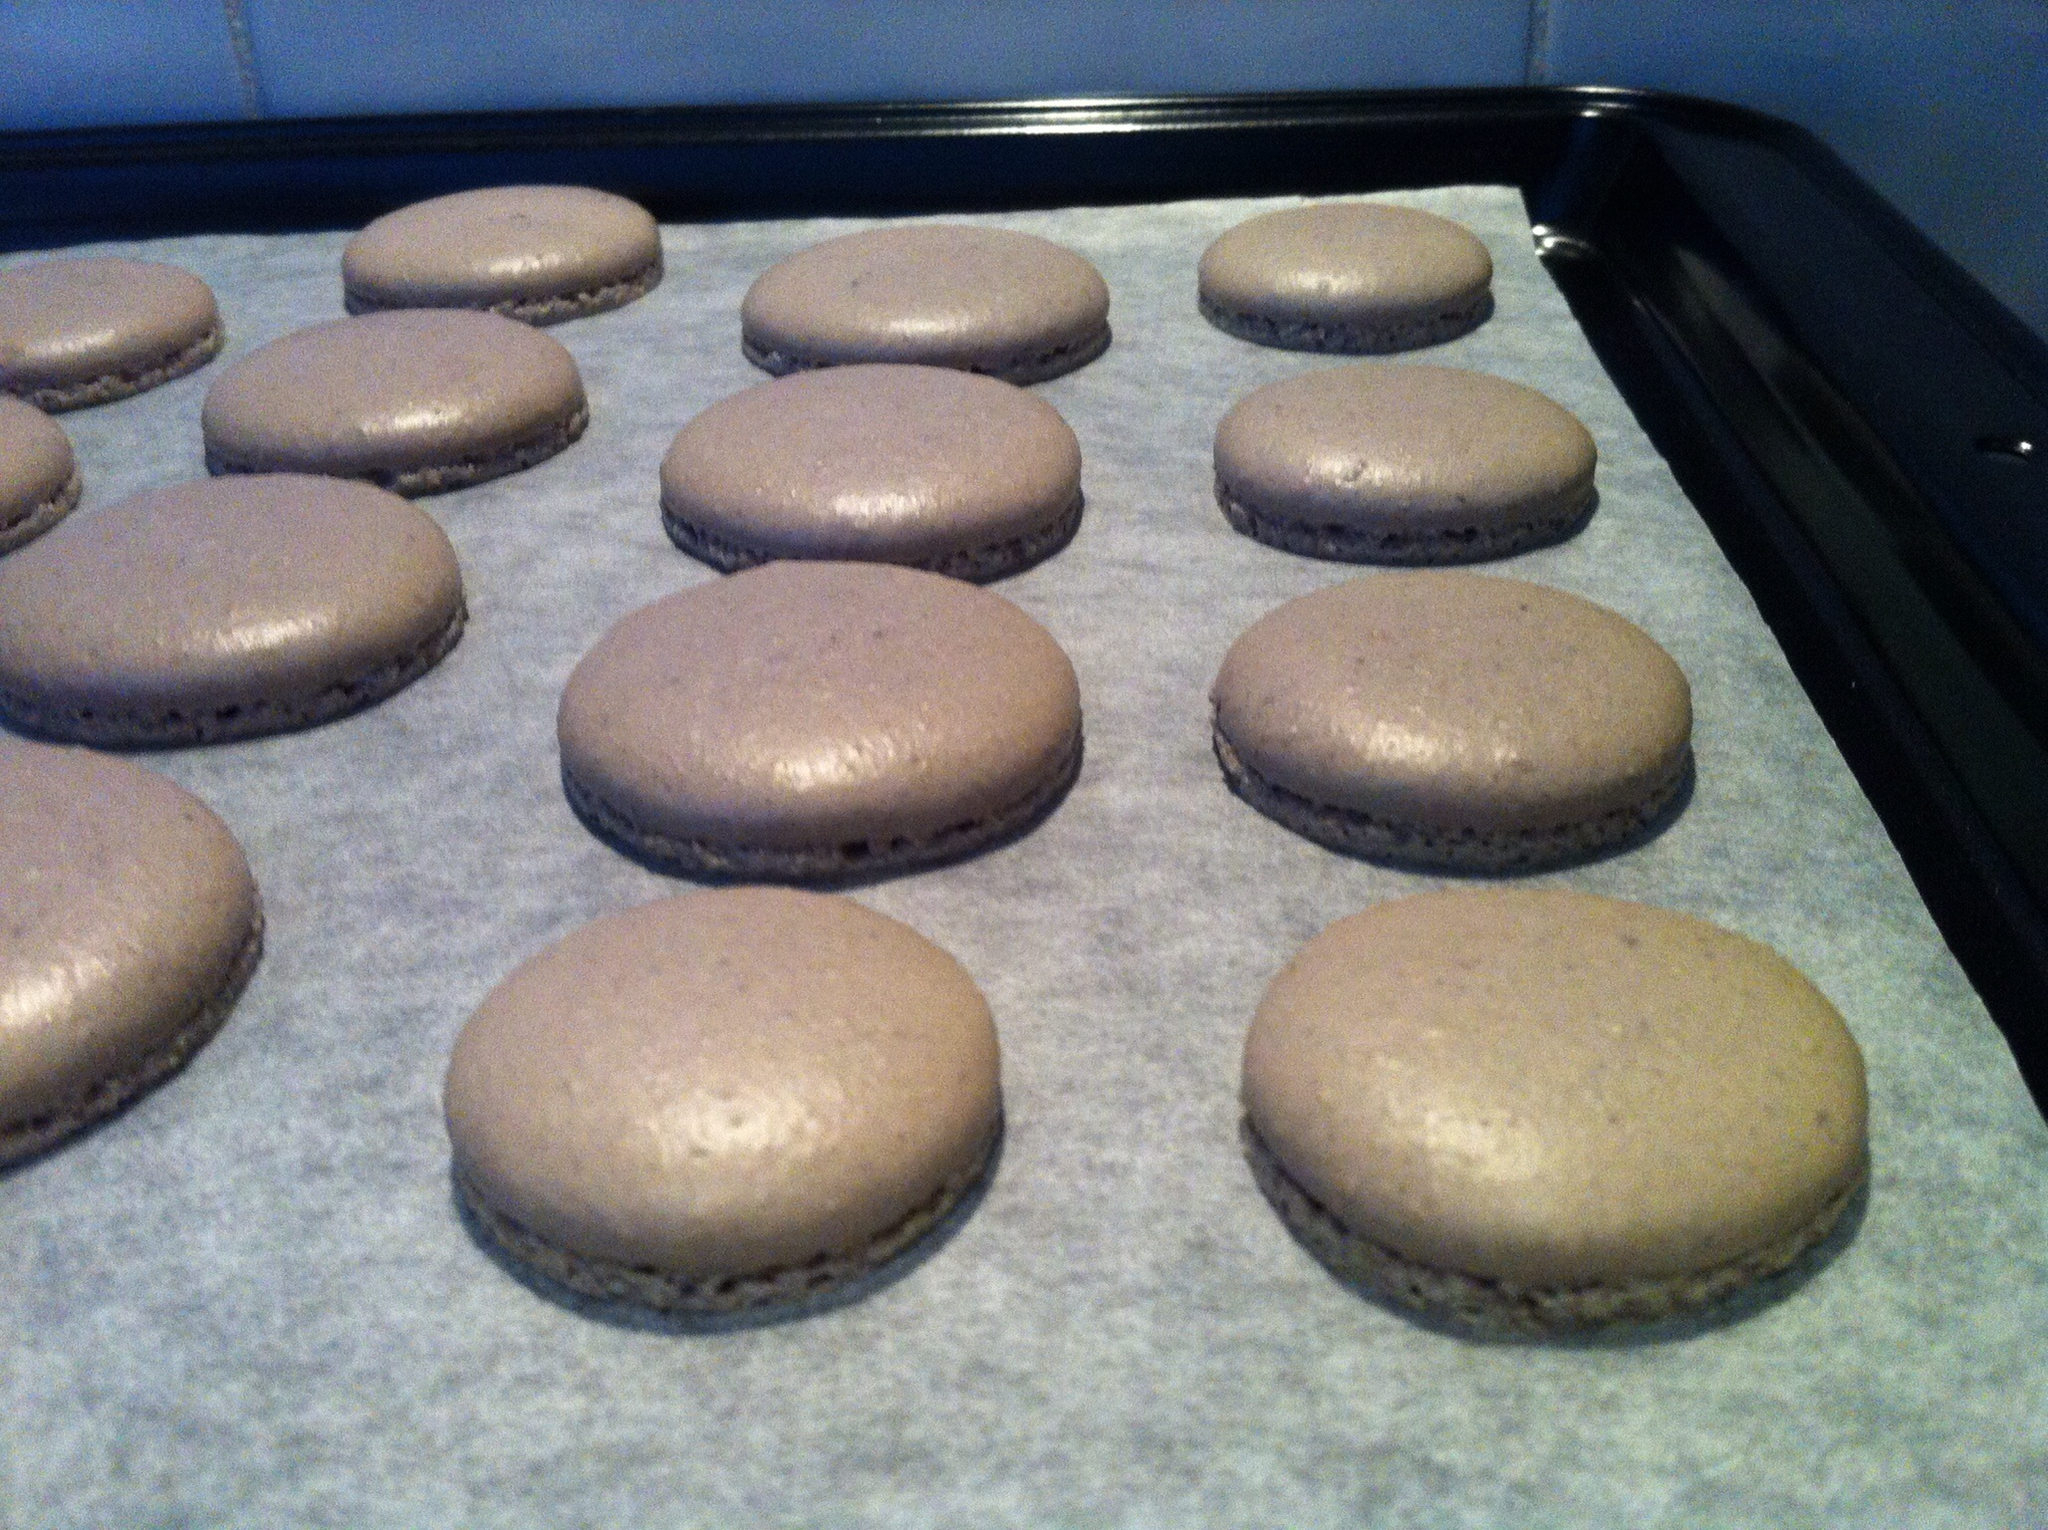
Neat rows of shells ready for baking. We added some of the black sesame to the shell to see if they'd look good. J said they looked like ants, but they did end up looking quite good.

Ganache recipes
Pandan and coconut
50g coconut milk
pandan extract (I added 3-3.5tsp )
90g white chocolate ( I used the nestle white chocolate melts)
35g unsalted butter, softened
5g dessicated coconut
Black Sesame
50g coconut milk
80g white chocolate
2tbsp of black sesame
- Melt the white chocolate in the microwave (or a bain marie)
- Add the butter and mix well
- Slowly add the coconut milk.
- Then add the rest of the ingredients and mix throughly.
- leave in the fridge to chill and set.


Yummy macarons ready for the party! And of course mini macarons for "taste testing" =)
Enjoy! and thanks for stopping by!

Bridge St Garage
Wednesday 14 May 2014

The place was packed out on a Friday night. The front of the restaurant was deck out with high tables and tall bar stools giving it more of a bar feeling and closer to the back of the restaurant were booths and normal height tables.

 |
| Garage Buffalo Wings ($15) |
We also also ordered the guacamole with corn chips ($13.50) and the lamb lollipops ($22). The guacamole was nice but nothing really special. The lamb lollipops were really nice, cooked just right, it was succulent and went really well with the chimichurri sauce. Not sure if it really worth the $22 but worth a try if you really love lamb.
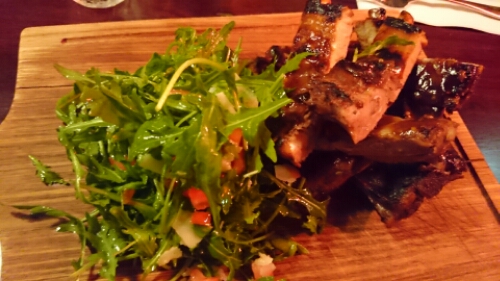 |
| Sticky pork ribs ($36) |
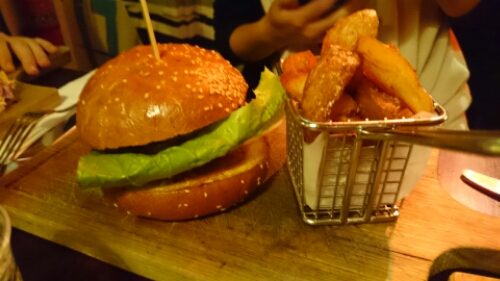 |
| Gaucho Burger ($19.50) |
 |
| New York cut steak ($32) |
 |
| Sweet potato chips ($9) |
 |
| Onion rings ($8) |
 |
| Deep-fried southern crispy chicken ($22) |
 |
| Trio of ice cream ($9) |
The trio of ice cream flavours were vanilla strawberry and mango. That mango ice cream was the best! It tasted like a weiss bar.
 |
| New York cheesecake ($12) |
 |
| American apple pie ($12) |
 |
| Garage brownie ($10) |
And the best for last the garage brownie. This was my favourite dessert. The brownie was warm and chocolatey with just the right amount of nuts. The rhubarb ice cream was really light and complimented the chocolate really well.


Bridge St Garage
17-19 Bridge st, Sydney
(02) 9251 9392
Visited May 2014

Baby Aviator hat
Saturday 3 May 2014
Lately I've been seeing a lot of cute baby beanies on Pinterest. I'm really loving the baby aviators recently and since my friends have just had a baby boy, I thought it was the perfect opportunity to make one!
I did a few searches online and came across this pattern from Sticky little fingers. I love the little goggles but I wanted the flap look :)
So here is my version with a few modifications.
I used a 4.5mm crochet hook. Brown yarn is 85% wool, 10% acrylic and 5% viscose blend yarn. Cream yarn is 100% acrylic.
 |
| Aviator hat on my little panda model. |
 |
| Side view |
 |
| Baby and happy daddy hanging out |
It was great visiting the new bubba!
Crochet Hoot
Tuesday 15 April 2014
Giggle and Hoot as become such a popular kids segment. I always seem to see some sort of merchandising around. I suppose it doesn't help that I walk past the ABC shop often and I visit my nieces and nephews generally in the afternoon/ evening when its on.
One of our friends recently had a Hoot themed birthday party for their one year old so I found a hoot pattern online. I did a search through a few sites but they all seemed to lead back to the one pattern. Thanks to Six little mice for providing this free hoot pattern. As always I changed a little of the pattern so it would look the way i wanted it to.
I didn't take photos of when I finished each piece but this photo below is after I sewed on each of the appendages but before putting on the face. I sewed the little heart on by doing the black lines directly onto the body but I think it would have looked a better if the heart was a little more to the right. Next time I'll tack it on first and make sure its in the right place. (Same goes with the Eyes!)

I'm a bit of a tight crocheter so when I was closing up the head, in my opinion it looked a bit strange so I'll be adding in a few extra rows if I make another Hoot.

Heres the finished Hoot! He ended up being around 15cm tall.
I made up the beak as I went along so I don't have the pattern for it but if someone really wants it then leave me a comment and I'll try to duplicate what I did and write it up.
He was really fun to make. Thanks for stopping by!
Whats my next craze?
Thursday 25 July 2013
Something on my mind of late has been my sense of indecisiveness. I've probably been aware of it subconsciously for a long time but I only started thinking about it when a friend of mind said "I cant wait for your next craze!". He meant it in a good way because he was so excited about it but it got me thinking...
So before my hobby switching stint, which I suppose it still ongoing, I used to learn Kung Fu. I started off learning traditional lion dancing ( the ones you see at Chinese New Year celebrations and new asian shop openings sometimes) and after a short while, probably after the second lesson I started kung fu training and I was hooked. That lasted for about 5 years and ranged from training 1-2 times a week, up to 5 days a week. They only had 5 days a week so if they had more I probably would have trained everyday if they had a class. I would train with my friends before and after classes as well but its different just training one on one with a mate.
One time I was training with my friend and he was teaching me how to spar, which I'm really crap at, and I ended up kneeing him in the knee and giving myself a bruised knee! It was so painful.
There are heaps of injury stores. When my best friend and I were learning a metal fan sparring set she dropped the fan on my face right near my eye and we were so freaked out that she had blinded me. It was scary at the time but now its a funny story because we went out of the training hall when it happened and when we came back in, I was fine and my best friend was in tears because she had been so freaked out that she could've been seriously injured. That set took ages to master after that because we didn't want to get too close together =p. There are quite a few injury stories which kind really does remind me of why I stopped even though I loved it so much.
Training it was the best carefree years of my life. It helped that this was just after high school and I was becoming independent getting to go out and meet new people and go out whenever I wanted. I met my two best friends at training as well, bonding over bruises =).
So after I stopped kung fu I didn't really pick up another hobby. I'd always done some craft stuff but not often, I'd probably just make a card here and there when I needed one.
I'm actually not sure how many hobbies I've run through in the last few years so I'm going to number them:
- Sewing - I've always liked to sew and I love buttons and fabrics, they're so pretty! I made some wallet pouches for my sisters and mum ( It's so then you can have your wallet on a rope around your wrist when you go to the shops to pick up something quickly and it stops your keys from scratching your nice leather wallet.
- I picked up playing guitar again when my friend said she wanted to start playing. I'd borrowed a guitar a long time ago and taught myself one or two songs before returning it. This time a different friend lent me his guitar for a couple of months before I bought my own semi acoustic guitar =). Its beautiful Yamaha with it a inbuilt tuner =). I've since taught myself more songs gotten obsessed with fingerstyle picking, finally learnt how to sing while playing and tried to wrap my head around some music theory. Actually tonight a friend from my hubbys work gave me a classical guitar and lent me a electric to muck around with. I've set the guitar aside for about 6 months now so I think it's time i get back into it.
- I created this blog just as something to document what I had been up to because I have a bad memory and as a guide to reference stuff like restaurants we'd been to and recipes I've tried (even though I've been pretty slack for ages now). Starting to blog also helped my to get my thoughts in order so I should make time to write more.
- I've always liked to cook and try new recipes. A friend of mine started coming over on my girls night and she taught me how to make Macarons, so we started baking something new and trying out a new dish every week. After about 2 months we noticed some pudge happening so we cut back on the baking. This coincided with getting busier at work and then having the next craze start.
- My fish craze! This started in March 2012 (I think) when my yabby (Hermione) , which I'd had for about 1.5 years was accidentally killed by my hubby ( >.< ). I wanted a replacement pet but not another yabby because I'd had a yabby before Hermione (Herman - haha i know.. my sister named Hermione because Herman was a escape artist and I was very upset that he had died on his exploration attempt!). So I did my research and decided I wanted either a fighting fish or an axolotl. Now I have both and heaps of other fish. Its calmed down a bit now so I've got it stable at 3 tanks atm =). It was a super craze! there was fish stuff everywhere! I think I got up to 8 tanks around the house at one stage.
- Knitting and crocheting came after the fish. My eldest sister knits and even though we all used to knit as kids I never knitted anything more then a scarf (lots of them for my toys until my mum told me to stop haha) and I never knew how to finish it off. So my sister taught me how to start the stitches on the needed, to do a knit and a purl. Out of these 3 I got 2 wrong "(@.@). So one and a half balls of yarn later, I saw a crocheted octopus in a shop window and I thought it was so cute! The next day, out of the blue my best friend gave me a amigurumi crochet book! I hadn't even mentioned to her that I saw it. So I bought a crochet hook and started crocheting with the help of the book, websites and youtube! I've since made a 20cm high minion toy, an assortment of other cute toys and a couple of beanies. Yarn everywhere!
- This one is more of a project rather then hobby. After the Avengers came out a while ago my hubby has been mentioning that it would be cool to make an Ironman suit. Sure I'd wear it to a convention as well but there's a particular nook at our place that I think would be awesome to have a full suit displayed =). So we decided we are going to make a Mark XII Ironman suit. We had a crazy of ebay, getting all the materials and now I've just got to find the time to make the parts. We're using the pepakura method.
- Youtube addiction! and iPhone games! so these aren't really hobbies but they are HUGE time wasters. I'm currently spending heaps of my time playing TribeZ.. it's just a build and expand kinda game, simple, cute graphics and I'm playing right now!! On Youtube I've discovered a few web series I like. I watched The Guild ages ago so I was subscribed to the Geek and Sundry channel which is how I discovered the show TableTop hosted by Will Wheaton. Damn it's reminded me how much I love to play board games! Then many related links later I came across nerdy nummies - a cooking show with nerdy themed foods, Coffeh time with Dodger - a daily vlog and whatever related link that looks interesting.
The Ironman suit is probably the project that has me most excited (it the most recent too) so if we finish that I'll be so super excited.
Thanks for reading if anyone has read the whole thing. Sometimes its just really nice to write it all down and get it organized in my head.
Japan destinations
Saturday 20 April 2013
Tokyo:
The first 3 points are all things we did in odaiba. For specifics on how to get to each place google works really well. and you might want to google other things to do there cos it is about an hr away from Akiharbara area.
 |
| Giant Gundam in front of Diver City |
1. Big Gundam and Gundam Cafe are in Odaiba. Catch the JR to Shinbashi (yamanote line) and change to the Odaiba island monorail. I think the stop to get off is Daiba station. You should be able to see the big Gundam from the monorail. Its right in front of a big shopping center called Diver city Tokyo. The light show is at 7.30pm and 8.30 pm weekdays, 7.30 and 8.15 weekends.
Diver City is quite big so you can do heaps of shopping here.
 |
| Open 2 wheeler at Megaweb |
2. Mega web: The toyota showroom where you can see toyotas technology and test drive cars. Theres a booking system and you may or may not need your international drivers license to be able to participate. So check out the details beforehand if you think you might want to drive any of the cars.
3. Joypolis an amusement park/ arcade. Ken and I went here only for the Intial D cars. Theres a few other interactive games but only the halfpipe game and the jet shooting game looked interesting. Theres an all day pass you can buy for unlimited rides and if you go later at night theres a cheaper rate.
 |
| Initial D game at Joypolis |
4. Remm Akihabara: We stayed here for the week we were in tokyo. It was about $150 per night. The room was small ish but really well set out and functional. Theres also an awesome massage chair that was really cool.
The best thing about staying at the Remm was location! The station is right next to the hotel and on the other side of the station is a 7 story yodobashi. The station is on the yamanote line and chuo lines.
Ken also checked out a hotel called the Washington hotel akiharbara. Its accross the street from the Remm. He chose Remm because its newer and the rooms didnt look as nice.
5. Main tokyo suburbs:
Akihabara: Heaps of models and figures and Tech. Look around before you buy everything, prices vary a bit for the same item and chances are you'll see it in another store. If you plan to do electronic shopping theres a website that lists the best prices around akihabara (kakaku.com). And if you shop at yodobashi or softmap we have loyalty cards that you can borrow, you get 10% (@yodobashi, 1% at softmap) of the purchase price as points and you can redeem it for other items. Great if you plan on getting any big ticket items.
Don Quijoto is akihabara is a 5 storey variety store. Its where you can get the theme onesies, funny hats in the shape of taiyakis or takoyaki and lots of snacks. Its a franschise so we also went to one in osaka.
 |
| takeshita street in harajuku |
Ginza: Sony and panasonic flagship stores are there. Its the more posh areas for shopping.
Harajuku: not as many harajuku girls here anymore but the park is nice and there are still lots of people there performing (drums, dj painter, old people dancing to Elvis music etc). Theres also a main shopping strip in harajuku and home to many crepe places. The street is on the opposite side of the station from the park. cross the street and head left. just follow the crowds.
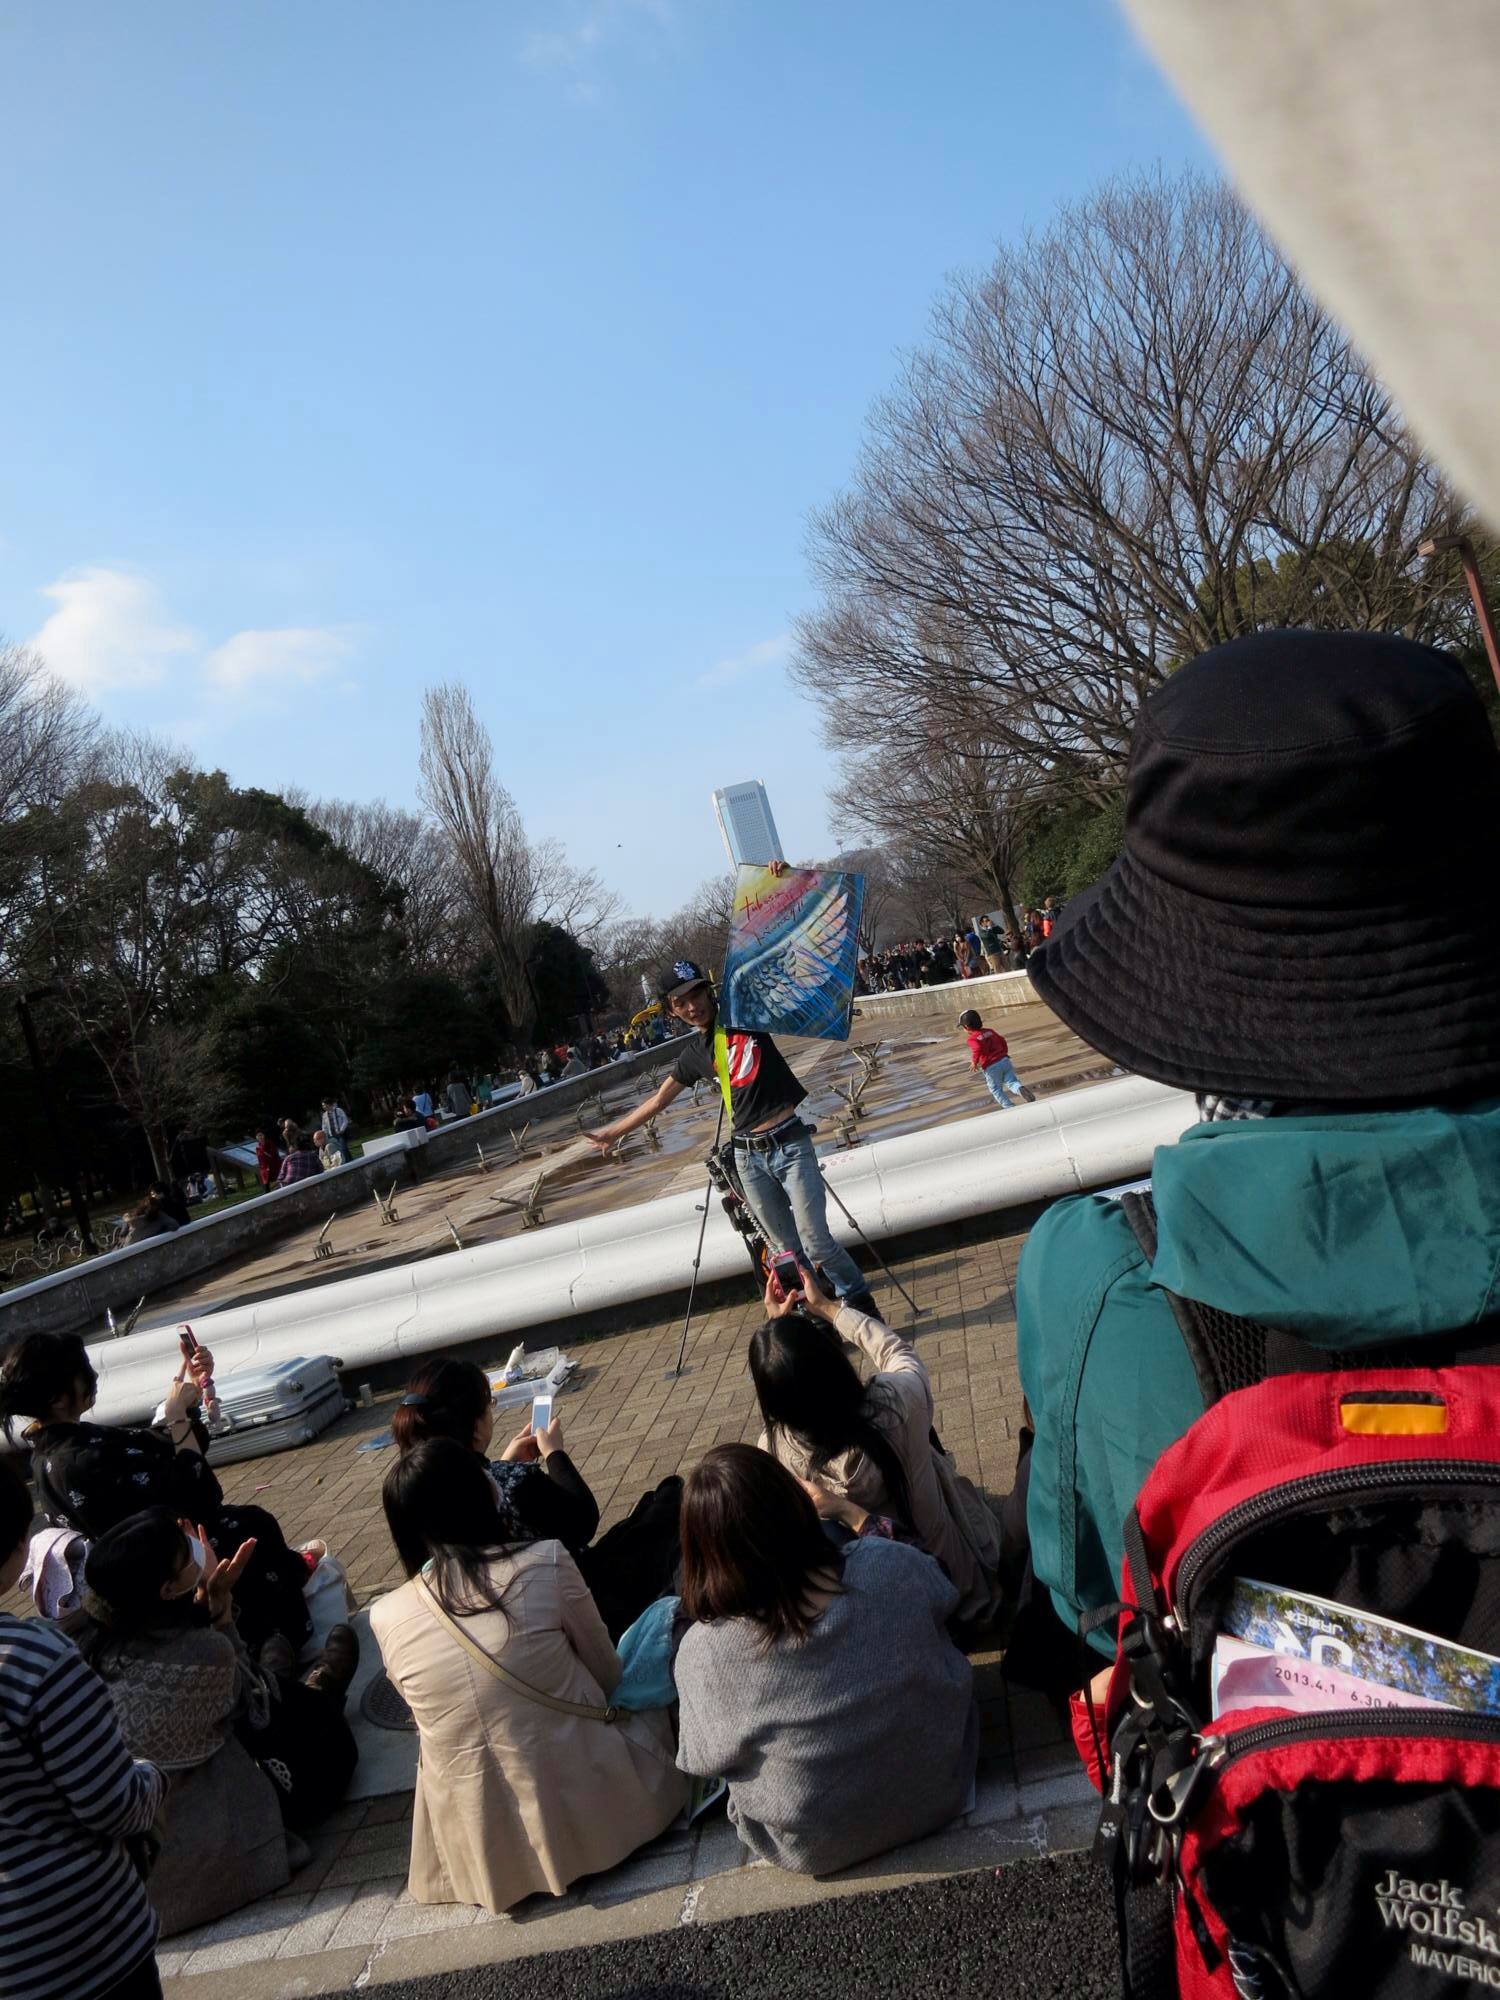 |
| Random dj painter in the park @ harajuku |
Shinjuku: Mainly fashion and shopping. Heaps of restaurants that looked interesting.
Shibuya: This is where the huge intersection is that you see in movies. Its on the corner just as you come out of the station.
6. Ghibli Museum: You can get tickets from JTB in townhall its about $15pp. Just look them up and fill in the online order sheet, they'll have tickets for you in a few days to pick up. you can also order your JR pass from them.
Nice place to visit if you're into the ghibi art and movies. Gift shop there sucks though so if you only want to go there for the merchandise then just look for a ghibli store in the main suburbs somewhere. The museum is in Mitaka about 40 mins away from akihabara.
Kyoto:
7. Contact the Good Samaritan Club: you can fill in a registration form on their website and nominate what days you would like to have a guide. Its free, you just shout them to lunch and pay for their ticket into the temples. They have a guide pass for some of the temples but not all of them. We had three days with them and all three of them were really fun and nice to hang out with for the day.
The mochi at the stalls around the temples are yum make sure you try the free samples. Kiyomizudera is the temple at the top of the hill, its surrounded but the old style city, It's one of the nicest areas. They'll probably take you there but if not you should ask them to take you its a nice area.
8. Melon Pan!!! ok this is actually the hokkaido melon pan but we found it first in Kyoto. Its the only melon pan that has the melon filling. It so delicious we had it every time we saw it! its the one with the smooth green top and only the one in Kyoto had the nice smooth rockmelon filling. The ones in tokyo had a different kind of melon filling and whipped cream. The kyoto one was better.
 |
| Hokkaido Melon pan!! *Drooooooools* |
9. Shinkyugoku and Ninja Restaurant: This is just a fun ninja themed restaurant you might want to try. It's on the main shopping strip on Kyoto called Shinkyogoku street. There is a big department store across the street and street main shopping strips. Two of them are shops for clothes and souviners and one of the strips is all food.
The ninja restaurant is off one of these strips. You should try the maze after you have dinner. It's not hard just a bit of fun.

10.
More info:
I came across this website that has all the clubs that offer tours in different areas. http://www.jnto.go.jp/eng/arrange/travel/guide/list_volunteerGuides_a-n.html
Simple Macaroons
Friday 10 August 2012
As part of our sweets making day I put up a picture of the fantastic macaroons my friend taught me to make. We made purple/ lilac colored ones half choc peppermint and half choc passionfruit flavoured.
For the shells we need:
140g egg whites (room temperature 180g caster sugar (split into 2 seperate bowls) 160g icing sugar 160g almond meal Food coloring Essence (Optional)


100g Dark Chocolate 90g of thicken cream 20g of Butter 1/3 can of passion fruit pulp or 1 tsp of peppermint essence
 We got the recipe off YouTube but used a slightly different ganache recipe. It's a French chef making the macaroons and a domestic kitchen. Enjoy!
 |
| A mini one just for fun |
140g egg whites (room temperature 180g caster sugar (split into 2 seperate bowls) 160g icing sugar 160g almond meal Food coloring Essence (Optional)
- First we sift almond meal and icing sugar into a bowl and set aside
- Mix egg whites in a bowl on low speed with an electric mixer until there is no more liquid.
- Then add in one of the bowls of caster sugar. Gradually increase speed and beat until the mixture forms stiff peaks.
- Add the second bowl of caster sugar, mix until the sugar has dissolve and the meringue forms stiff peaks.
- Add coloring to the mixture of dry ingredients, essence can also be added at this stage if you wanted the flavoring in the shells rather then the filling. Lightly mix color through.
- Tip into the meringue mixture. Starting slowly stir mixture together making sure all ingredients are combined. Then start scratching the surface while accelerating as you stir. You can be a bit rough at this point because you want to knock out some of the air.
- The mixture will become more liquid and it is ready when it falls off the spatula easily and takes about 20 seconds to ooze back. If the fallen part just sits on top then keep mixing.

- On a lined baking tray pipe out the shells trying to keep consistent sizes. After piping is finished take both sides of the tray and bang it a couple of times on a hard surface. This is to get rid of some air and to settle the imperfections from piping.
- Preheat oven to 150 degrees and leave the macaroons to sit in room temperature until they form a skin. Bake in the oven for approximately 12 minutes or until they are solid when touched.
- Leave them to cool before piping in the filling.
100g Dark Chocolate 90g of thicken cream 20g of Butter 1/3 can of passion fruit pulp or 1 tsp of peppermint essence
- Melt chocolate in the microwave and mix in the butter and thichken cream.
- Split into two portions. In one portion add in a few drops of peppermint essence and mix.In the other portion sieve in the passionfruit pulp and mix.
- Put mixtures into the fridge until ready to use or is set. Should be less liquidy.
- Match up the shells together
- You can either use a piping bag or we just used a spoon. Place a bit in the center of one side and place the other half on top and give it a little squeeze. The filling should come just out to the edges.

Cocoa Chiffon cake
Friday 3 August 2012
For over a week I'd been craving pandan cake but when I went to the Asian supermarkets in Auburn, none of them had pandan leaves or essence. Not wanting to drive to cabramatta we decided to at least have chiffon cake.
 I found this recipe from the group recipes website but we just made the cake and not the icing. We also adjusted some of the amounts, 7/8 cups is a bit fiddly to measure out. The link to the original recipe is below if you want to checkout the original.
Also we accidentally added bicarbonate soda instead of baking powder, so the cake turned out a little more dense then what's expected of chiffon cake. It was still tasty even if it didn't turn out exactly how we wanted.
Cocoa Chiffon cake
Serves 8
Ingredients
100mls of boiling water
1/4 cup of cocoa
1 cup of sifted "soft as silk" flour ( we used gluten free wheat flour)
1 cup of sugar
1 1/2 tsp of baking powder
1/2 tsp of salt
1/4 cup of salad oil
4 unbeaten egg yolks
1/2 teaspoon of vanilla extract
4 egg whites
1/4 tsp of cream of tartar
Method:


 Yum yum.

Also we accidentally added bicarbonate soda instead of baking powder, so the cake turned out a little more dense then what's expected of chiffon cake. It was still tasty even if it didn't turn out exactly how we wanted.
Cocoa Chiffon cake
Serves 8
Ingredients
100mls of boiling water
1/4 cup of cocoa
1 cup of sifted "soft as silk" flour ( we used gluten free wheat flour)
1 cup of sugar
1 1/2 tsp of baking powder
1/2 tsp of salt
1/4 cup of salad oil
4 unbeaten egg yolks
1/2 teaspoon of vanilla extract
4 egg whites
1/4 tsp of cream of tartar
Method:
- Mix cocoa and boiling water and stir until smooth.
- In a mixing bowl sift together flour, sugar, baking powder and salt.
- Make a well and add in order; salad oil, unbeaten egg yolks, the cooled cocoa mixture and 1/2 a tsp of vanilla. Beat with a spoon until smooth.
- In a large mixing bowl, whip eggs hits lightly. Add the cream of tartar and whip until it forms stiff peaks.

- Pour cocoa and egg yolk mixture gradually over the whipped egg whites, gently fold together with a rubber spatula until just blended. DO NOT STIR.

- Pour into an ungreased pan at once. Bake at 160 C/325 F degrees for 50-55 minutes.

- The cake is ready when a skewer comes out clean. Leave to cool for a bit and over turn onto a plate.

Subscribe to:
Posts (Atom)


